
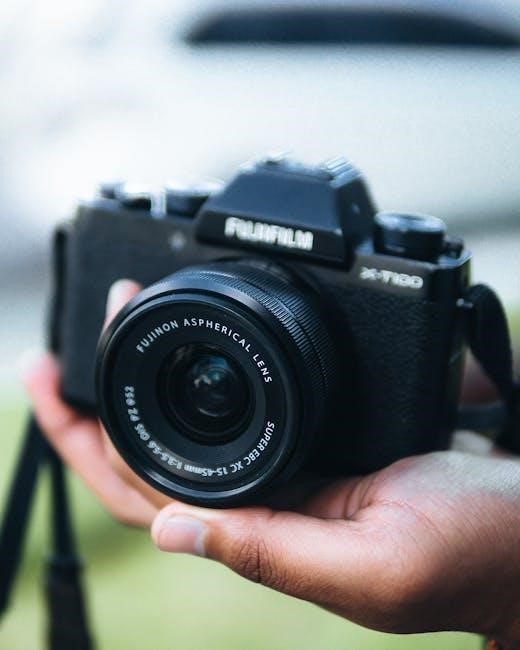
Embarking on a journey into manual settings unlocks creative control, allowing photographers to transcend automatic limitations and truly capture their vision․
Mastering these settings—shutter speed, aperture, and ISO—is crucial for consistently stunning outdoor images, especially when light conditions fluctuate․
While Aperture Priority excels in landscapes, and automatic modes suffice sometimes, manual mode becomes indispensable in challenging scenarios․
Understanding the interplay of these three elements, known as the exposure triangle, is the foundation for successful manual photography․
Why Choose Manual Mode?
Stepping into manual mode grants photographers unparalleled artistic freedom, moving beyond the constraints of automated systems․ While convenient, automatic modes often misinterpret scenes, leading to suboptimal exposure or creative compromises․ Manual control allows you to dictate precisely how your camera interprets the light, ensuring your images reflect your intended vision․
Specifically for outdoor photography, where lighting conditions are constantly shifting, manual mode proves invaluable․ Relying on the camera’s meter in bright sunlight or dappled shade can result in blown-out highlights or underexposed shadows․ Manual settings empower you to maintain consistent exposure across a series of shots, even as the light changes․

Furthermore, mastering manual mode fosters a deeper understanding of the exposure triangle – aperture, shutter speed, and ISO․ This knowledge isn’t just about achieving correct exposure; it’s about creatively manipulating these settings to control depth of field, motion blur, and image noise․ Ultimately, manual mode isn’t just a setting; it’s a pathway to becoming a more skilled and expressive photographer․
Understanding the Exposure Triangle
The exposure triangle comprises three interconnected elements: aperture, shutter speed, and ISO․ Mastering their relationship is fundamental to manual photography․ Aperture controls the lens opening, influencing depth of field – the area in focus․ Wider apertures (lower f-numbers) create shallow depth of field, ideal for portraits, while narrower apertures (higher f-numbers) maximize sharpness throughout the scene, perfect for landscapes․
Shutter speed dictates how long the camera’s sensor is exposed to light․ Faster shutter speeds freeze motion, essential for wildlife or sports, while slower speeds blur motion, conveying a sense of movement․ ISO measures the sensor’s sensitivity to light․ Lower ISOs produce cleaner images, but require more light, whereas higher ISOs allow shooting in low light, but introduce noise․
These three settings aren’t independent; adjusting one necessitates compensating for the others to maintain proper exposure․ For instance, increasing aperture requires decreasing shutter speed or increasing ISO․ Understanding this interplay allows photographers to achieve creative control over their images, balancing sharpness, motion, and noise․
Core Camera Settings for Outdoor Shoots
Establishing a solid foundation with ISO, aperture, and shutter speed is paramount for outdoor success․ These settings dictate image quality, depth, and motion capture․
Precise control over these core elements unlocks creative potential and ensures consistently well-exposed photographs․
ISO Settings: Minimizing Noise
ISO determines your camera’s sensitivity to light, directly impacting image noise․ Lower ISO values (typically 100-200) produce cleaner images with minimal noise, ideal for bright outdoor conditions․ However, lower ISOs require more light, necessitating wider apertures or slower shutter speeds․
Conversely, higher ISOs (400, 800, or higher) allow shooting in low light, but introduce digital noise – graininess that degrades image quality․ For outdoor photography, prioritize the lowest possible ISO to maintain maximum detail and clarity․ Only increase ISO when absolutely necessary to achieve a proper exposure with your desired aperture and shutter speed․

Modern cameras handle higher ISOs better than older models, but noise is still a trade-off․ Experiment to find the highest usable ISO for your camera, balancing brightness with acceptable noise levels․ Remember that post-processing software can reduce noise, but it’s always best to minimize it at the source․
Aperture Control: Depth of Field in Landscapes
Aperture, measured in f-stops (e․g․, f/8, f/11, f/16), controls the lens opening and significantly impacts depth of field – the area in focus․ For landscape photography, a narrow aperture (higher f-number, like f/8 to f/11) is generally preferred․ This maximizes depth of field, ensuring sharpness from foreground to background․
A wider aperture (lower f-number, like f/2․8 or f/4) creates a shallow depth of field, blurring the background and isolating subjects – more suitable for portraits․ However, extremely narrow apertures (f/16 or higher) can introduce diffraction, slightly softening the image․
Experiment to find the sweet spot for your lens, balancing depth of field with optimal sharpness․ Consider the composition; if a specific element is the focal point, a slightly wider aperture can draw attention to it․ Remember that aperture also affects exposure, requiring adjustments to shutter speed or ISO․
Shutter Speed: Capturing Motion and Sharpness
Shutter speed, measured in seconds or fractions of a second (e․g․, 1/250s, 1s, 5s), determines how long the camera’s sensor is exposed to light․ It directly impacts both motion blur and image sharpness․ Faster shutter speeds (e․g․, 1/500s or faster) freeze motion, ideal for wildlife or sports photography․ Conversely, slower shutter speeds (e․g․, 1/30s or slower) create motion blur, conveying a sense of movement․
For static landscapes, a shutter speed of 1/125s or faster is generally sufficient to avoid camera shake, especially when using a longer focal length lens․ A common guideline suggests setting your shutter speed to at least twice your focal length to prevent blur․
Remember that shutter speed also affects exposure; slower speeds let in more light, requiring adjustments to aperture or ISO․ Experiment with different shutter speeds to creatively capture motion or ensure absolute sharpness․
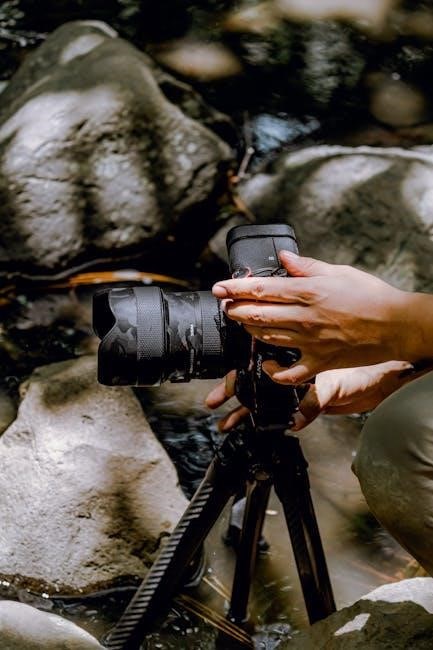
Advanced Settings for Specific Outdoor Scenarios
Refining your technique involves mastering metering modes, white balance, and focusing․ These settings dramatically impact image accuracy and artistic expression in diverse outdoor conditions․
Precise control over these elements elevates your photography beyond basic exposure, yielding professional-quality results․
Metering Modes: Achieving Accurate Exposure
Understanding metering modes is paramount for achieving accurate exposure in manual mode, as the camera needs guidance to assess the scene’s brightness․ Evaluative/Matrix metering analyzes the entire frame, suitable for balanced lighting, but can be fooled by strong backlighting or contrasting subjects․
Center-weighted average metering prioritizes the center of the frame, ideal for portraits where the subject is centrally located․ Spot metering measures light from a very small area, offering precise control for challenging situations like photographing a subject against a bright sky․

For landscapes, evaluative metering often works well, but consider spot metering to ensure correct exposure for specific elements․ In portraits, center-weighted or spot metering on the subject’s face guarantees proper skin tone rendition․ Always review your histogram after taking a test shot to confirm accurate exposure and avoid clipping highlights or shadows․ Experimenting with different modes allows you to tailor exposure to the specific demands of each scene, maximizing your creative control․
White Balance: Correcting Color Casts
White balance (WB) dramatically impacts the color accuracy of your outdoor photographs, correcting unwanted color casts caused by different light sources․ Auto White Balance (AWB) is convenient, but often struggles with mixed or unusual lighting․ Preset modes like ‘Daylight’, ‘Cloudy’, or ‘Shade’ offer quick fixes for common scenarios․
For precise control, utilize custom white balance․ Photograph a neutral gray card under the prevailing light, then tell your camera to use that as a reference․ This ensures accurate colors, especially crucial for professional work․ Shooting in RAW allows for non-destructive WB adjustments in post-processing, offering flexibility if you’re unsure during the shoot․
Consider the mood – a slightly warmer WB can enhance golden hour portraits, while a cooler WB can emphasize the crispness of a winter landscape․ Mastering WB ensures your images faithfully represent the scene, or creatively interpret it as desired․
Focusing Techniques: Sharpness in Variable Light
Achieving sharp focus outdoors demands adapting to varying light and subject movement․ Autofocus (AF) offers convenience, but manual focus (MF) provides ultimate control, especially in low light or with challenging subjects․ Single-point AF is ideal for static subjects, allowing precise focus placement․ Continuous AF (AF-C) tracks moving subjects, crucial for wildlife photography․

Back-button focus separates focusing from the shutter release, enabling you to lock focus and recompose without refocusing․ Focus peaking, available on many cameras, highlights in-focus areas, aiding manual focusing․ Depth of field influences sharpness; a narrower aperture (higher f-number) increases it, beneficial for landscapes;
Pay attention to light – low light can hinder AF performance, necessitating MF or careful AF point selection․ Regularly check focus on your LCD screen, zooming in to confirm sharpness․
Optimizing Settings for Different Outdoor Genres
Genre-specific settings are key: landscapes favor narrow apertures (F8-F11) and low ISO, while portraits benefit from wider apertures and careful metering․
Wildlife demands fast shutter speeds to freeze motion, often paired with higher ISOs and continuous autofocus for tracking subjects effectively․
Landscape Photography Settings
For breathtaking landscapes, prioritize sharpness and depth of field․ Begin by setting your camera to manual mode, granting full control over exposure․ Crucially, keep your ISO as low as possible – typically ISO 100 – to minimize noise and maximize image quality․ This ensures clean, detailed images, especially important for large prints․
Aperture is paramount; aim for settings between F8 and F11․ This range provides a substantial depth of field, ensuring that both foreground and background elements are in focus․ Experiment slightly; F16 can increase depth of field further, but may introduce diffraction, softening the image․
Shutter speed will depend on the available light and your aperture․ Use a tripod for slower shutter speeds to prevent camera shake․ Utilize your camera’s histogram to evaluate exposure, aiming for a balanced distribution without clipping highlights or shadows․ Consider using a remote shutter release or the camera’s self-timer to further minimize vibrations․
Finally, pay attention to white balance, selecting a preset or custom setting to accurately represent the scene’s colors․
Portrait Photography Settings (Outdoor)
Outdoor portraiture thrives on soft, flattering light and pleasing background blur․ Begin in manual mode for complete control․ Prioritize a low ISO, ideally 100, to maintain image clarity and minimize noise, crucial for skin tones․ Aperture is key to achieving that desirable background separation – aim for wider apertures like F2․8 to F5․6․
Wider apertures create a shallow depth of field, beautifully blurring the background and drawing focus to your subject․ Shutter speed must be fast enough to freeze motion, especially if photographing a moving subject; start around 1/200th of a second and adjust as needed․
Pay close attention to metering; spot metering on your subject’s face ensures accurate exposure for skin tones․ Utilize a reflector to bounce light and fill in shadows, creating a more even illumination․ Consider white balance carefully, adjusting to match the ambient light and achieve natural skin tones․
Remember to check your histogram to avoid blown-out highlights․
Wildlife Photography Settings
Capturing wildlife demands swift reactions and precise settings․ Manual mode is essential for consistent results, especially when dealing with rapidly changing light․ Prioritize a fast shutter speed – starting at 1/500th of a second, and often exceeding 1/1000th – to freeze the action of moving animals․
ISO will likely need to be increased to achieve these speeds, but strive to keep it as low as possible to minimize noise․ Aperture selection depends on the desired depth of field; F5․6 to F8 offers a good balance between sharpness and light gathering․
Utilize continuous autofocus (AF-C) and select an appropriate focus area mode to track your subject․ Metering mode should be evaluative or matrix, but be prepared to use exposure compensation to fine-tune the exposure․ Plan your field shoot and have a camera checklist ready for quick adjustments․
Remember to anticipate the animal’s movements!
Practical Tips and Troubleshooting
Regularly review your histograms to ensure proper exposure, avoiding blown highlights or crushed shadows․ Adapt settings based on light, and don’t hesitate to experiment!
Harsh sunlight requires careful exposure, while low light demands higher ISO and wider apertures․
Using Histograms to Evaluate Exposure
Histograms are invaluable tools for objectively assessing exposure, moving beyond relying solely on the camera’s LCD screen, which can be misleading due to brightness and contrast variations․ A histogram is a graphical representation of the tonal distribution within an image, plotting pixel brightness from left (darkest) to right (brightest)․
Ideally, a well-exposed image will have a histogram that spans most of the graph, without clipping—meaning no pixels are jammed against the far left or right edges․ Clipping on the right indicates blown-out highlights, losing detail in bright areas, while clipping on the left signifies crushed shadows, lacking detail in darker regions․
For landscapes, a slightly right-biased histogram is often acceptable, prioritizing detail in the shadows․ For portraits, a more balanced histogram is preferred, ensuring skin tones are accurately represented․ Learning to interpret these visual cues allows for precise adjustments to aperture, shutter speed, and ISO, resulting in consistently well-exposed outdoor photographs․ Regularly checking the histogram during shooting is a habit that will dramatically improve your results․
Dealing with Harsh Sunlight
Harsh sunlight presents unique challenges for outdoor photographers, often resulting in blown-out highlights, deep shadows, and unflattering contrast․ Mitigating these issues requires strategic adjustments to camera settings and shooting techniques․ Lowering your ISO to its base level (typically 100) minimizes noise and maximizes dynamic range․
Employing a smaller aperture, such as f/8 to f/11, increases depth of field, ensuring sharpness throughout the scene․ Adjusting shutter speed is crucial for proper exposure, but be mindful of motion blur․ Utilizing a polarizing filter reduces glare and reflections, enhancing color saturation and contrast․
Seeking shade or shooting during the golden hours—shortly after sunrise and before sunset—provides softer, more diffused light․ Consider using fill flash to brighten shadows, balancing the exposure and revealing hidden details․ Careful histogram evaluation is essential to avoid clipping highlights or shadows, ensuring a balanced and visually appealing image․
Shooting in Low Light Conditions
Low light presents a significant hurdle for outdoor photographers, demanding careful consideration of camera settings to capture usable images․ Increasing ISO is often necessary, but be mindful of the trade-off between sensitivity and noise․ Start with the lowest possible ISO and incrementally increase it until a suitable shutter speed is achieved․
Utilizing a wider aperture, such as f/2․8 or wider, allows more light to enter the lens, enabling faster shutter speeds․ Slowing down the shutter speed is another option, but requires a stable shooting platform—a tripod is essential to prevent motion blur․
Employing manual focus can be beneficial, as autofocus systems may struggle in low light․ Careful metering is crucial to avoid underexposure․ Regularly check the histogram to ensure sufficient detail in both highlights and shadows, and don’t be afraid to experiment with different settings to find the optimal balance․

Resources and Further Learning
Expanding your knowledge beyond this guide is crucial for mastering manual settings in outdoor photography․ Numerous online platforms offer comprehensive tutorials and workshops, catering to all skill levels․ Websites like Digital Photography School and Photography Life provide in-depth articles and practical advice․
YouTube channels dedicated to photography, such as Peter McKinnon and Mike Browne, offer visual demonstrations and real-world examples․ Consider investing in online courses from platforms like Skillshare or Udemy for a structured learning experience․
Exploring photography books focused on manual mode and outdoor techniques can provide a solid theoretical foundation․ Joining photography communities and forums allows you to connect with fellow enthusiasts, share your work, and receive constructive feedback․ Practice consistently, experimenting with different settings and scenarios to solidify your understanding․