
Understanding Tibialis Posterior Tendon Dysfunction (PTTD)
PTTD arises from posterior tibial tendon damage, impacting arch support during walking․ Strengthening, stretching, and balance exercises are crucial for managing this condition effectively, as noted in recent studies․
What is the Tibialis Posterior Tendon?
The tibialis posterior tendon is a vital structure connecting the calf muscle to the bones within the foot․ Its primary function is to support the foot’s arch, particularly during weight-bearing activities like walking and running․ This tendon acts as a crucial stabilizer, preventing the arch from collapsing․
Damage or dysfunction to this tendon leads to Posterior Tibialis Tendon Dysfunction (PTTD)․ It’s responsible for inversion of the foot – turning the sole inward – and plantarflexion, pointing the toes downward․ Maintaining its strength and flexibility is paramount for proper foot mechanics and preventing conditions like flatfoot․ Exercises targeting this tendon aim to restore its supportive capabilities and alleviate associated pain․
Causes of PTTD
PTTD often develops gradually over time, frequently stemming from overuse or repetitive strain․ Acute injuries, such as falls, can also contribute, though less commonly․ Risk factors include high-impact activities, obesity, and conditions like hypertension or diabetes․
The tendon weakens and deteriorates, losing its ability to adequately support the arch․ This can be exacerbated by improper footwear or biomechanical issues like overpronation (excessive inward rolling of the foot)․ Age also plays a role, as tendons naturally lose elasticity with time․ Early intervention, including targeted exercises, can help mitigate the progression of PTTD and prevent further damage to this critical supporting structure․
Symptoms of PTTD
Initial symptoms often include pain along the inside of the ankle and foot, which may be mild and intermittent․ As the condition progresses, individuals may notice a flattening of the arch, particularly during weight-bearing activities․ Swelling around the ankle is common, and walking can become increasingly painful․

Over time, the foot may begin to turn outward (eversion), and stiffness can develop․ Ignoring these early signs can lead to chronic pain and functional limitations․ Individuals might experience difficulty with activities like walking, running, or even standing for extended periods․ Early diagnosis and appropriate management, including exercise programs, are crucial to prevent long-term complications․
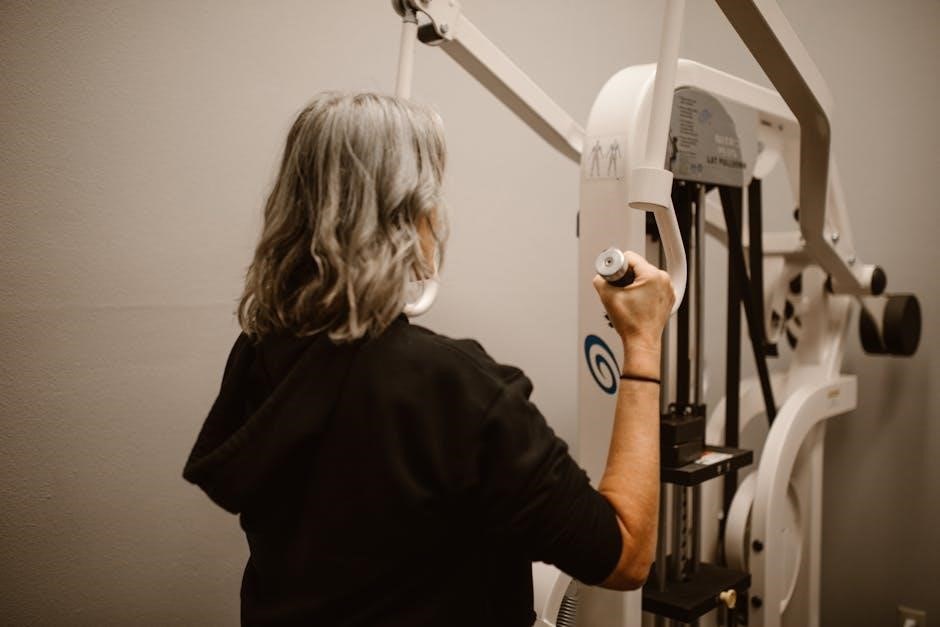
Non-Surgical Treatment Options
Initial treatment focuses on reducing pain and inflammation through rest, ice, and physical therapy, including targeted exercises and supportive orthotics for arch support․
Importance of Early Intervention
Addressing PTTD in its early stages is paramount to preventing progressive deformity and potential need for surgical intervention․ Early intervention, incorporating a structured exercise program, can significantly slow the condition’s advancement․ Ignoring initial symptoms allows the tendon to weaken further, leading to increased arch collapse and foot instability․
Promptly initiating exercises – focusing on strengthening the tibialis posterior, improving flexibility, and enhancing balance – can restore function and alleviate pain․ Combining exercise with appropriate orthotic support provides crucial arch stabilization․ Delaying treatment often results in a more challenging rehabilitation process and a diminished likelihood of successful non-surgical management, as highlighted by clinical guidelines․
Orthotics and Arch Support
Utilizing orthotics and arch support is a cornerstone of PTTD management, often implemented alongside a targeted exercise regimen․ Custom or over-the-counter orthotics help control pronation and redistribute pressure, reducing stress on the compromised tibialis posterior tendon․ They provide essential support to the medial longitudinal arch, preventing further collapse and alleviating pain․
Arch support isn’t solely reliant on orthotics; appropriate footwear with good arch support is also vital․ Combining orthotic intervention with consistent exercise – strengthening the tendon and surrounding muscles – yields optimal results․ This dual approach addresses both symptom relief and the underlying biomechanical issues contributing to PTTD progression, enhancing long-term stability and function․

Tibialis Posterior Exercises: A Comprehensive Guide
A progressive exercise program, encompassing range of motion, strengthening, and functional movements, is essential for rehabilitating PTTD and restoring optimal foot and ankle function․
Phase 1: Gentle Range of Motion & Stretching
This initial phase focuses on restoring pain-free movement and flexibility․ Begin with calf stretches, holding each stretch for 30 seconds and repeating 2-3 times daily․ These address tightness often accompanying PTTD․ Next, the towel stretch gently improves dorsiflexion․ Sit with your leg extended, loop a towel around your toes, and gently pull back, holding for 30 seconds․
Prioritize slow, controlled movements, avoiding any sharp pain․ The goal isn’t aggressive stretching, but rather preparing the tendon and surrounding tissues for more demanding exercises․ Maintaining a comfortable range of motion is paramount․ These gentle exercises lay the foundation for subsequent strengthening phases, minimizing the risk of re-injury and promoting healing․ Remember to listen to your body and modify as needed․
Calf Stretches
Gastrocnemius Stretch: Stand facing a wall, one leg slightly behind the other, heel firmly planted․ Lean forward, keeping your back leg straight, until you feel a stretch in your upper calf․ Hold for 30 seconds, repeat 3 times․ Soleus Stretch: Perform the same stretch, but bend your back knee slightly; This targets the lower calf muscle․
Ensure a controlled, pain-free stretch․ Tight calf muscles can exacerbate PTTD symptoms by limiting ankle mobility․ Regular calf stretching improves ankle dorsiflexion, reducing strain on the posterior tibial tendon․ Focus on maintaining proper form – a straight back and a consistent, gentle pull․ Consistency is key; perform these stretches daily for optimal results․
Towel Stretch
How to Perform: Sit with your legs extended․ Loop a towel around your toes, holding the ends with your hands․ Gently pull back on the towel, keeping your knee straight, until you feel a stretch in the back of your lower leg and potentially into the arch of your foot․
Hold this stretch for 15-30 seconds, repeating 3-5 times․ This stretch targets both the calf muscles and the plantar fascia, improving flexibility and reducing tension that can contribute to PTTD․ Avoid overstretching; the sensation should be a gentle pull, not pain․ This exercise enhances ankle range of motion and prepares the tissues for more intensive strengthening exercises․
Phase 2: Strengthening Exercises ー Low Impact

This phase focuses on gently rebuilding strength in the tibialis posterior muscle without placing excessive stress on the tendon․ Begin with Isometric Tibialis Posterior Strengthening – imagine resisting the inward rolling of your foot while keeping it stationary․ Hold for 5-10 seconds, repeating 10-15 times․
Next, incorporate Resisted Plantar Flexion and Inversion with Theraband․ Secure a theraband and loop it around your foot․ Slowly pull your foot downwards and inwards against the resistance․ Perform 2-3 sets of 10-15 repetitions․ These exercises are designed to improve muscle endurance and prepare for more challenging movements, as highlighted in recent research․
Isometric Tibialis Posterior Strengthening
This foundational exercise builds initial strength without joint movement․ Sit with your foot flat on the floor․ Imagine pressing the inside of your foot into the ground, attempting to invert your ankle – but don’t actually move it․ You should feel the muscle on the inside of your lower leg engage․
Hold this contraction for 5-10 seconds, focusing on maintaining consistent effort․ Repeat 10-15 times per set, completing 2-3 sets․ This exercise is pain-free and helps activate the tibialis posterior, preparing it for more dynamic strengthening․ Adjust the intensity by increasing the imagined resistance, ensuring minimal discomfort throughout the exercise․
Resisted Plantar Flexion and Inversion with Theraband
Utilize a resistance band (Theraband) looped around your foot․ Secure the other end to a stable object․ Sit with your leg extended․ Simultaneously point your toes downwards (plantar flexion) and turn the sole of your foot inwards (inversion), working against the band’s resistance․
Maintain slow, controlled movements throughout the exercise․ Perform 10-15 repetitions for 2-3 sets․ Gradually increase the band’s resistance as your strength improves․ This exercise directly targets the tibialis posterior, enhancing its ability to support the arch․ Focus on feeling the muscle working, and stop if you experience any sharp pain․ Consistent practice is key to building strength․
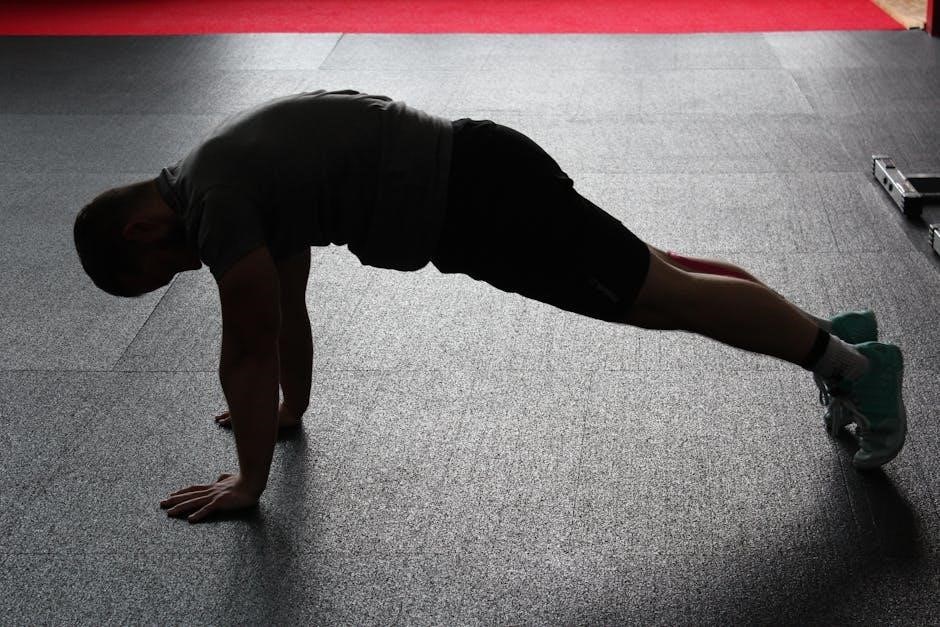
Phase 3: Strengthening Exercises ー Progressive Loading
This phase builds upon previous strengthening, introducing exercises with increased demand․ Eccentric heel drops and single leg balance are key components․ Eccentric exercises focus on lengthening the muscle while contracting, promoting tendon health․ Begin with controlled movements, prioritizing form over quantity․
Progressive loading means gradually increasing the challenge – adding repetitions, sets, or resistance․ Monitor your pain levels closely; discomfort is acceptable, but sharp pain indicates overexertion․ This phase aims to prepare the tibialis posterior for functional activities, improving its capacity to handle daily stresses and prevent re-injury․ Consistency and mindful progression are vital․
Eccentric Heel Drops
Eccentric heel drops specifically target the posterior tibialis tendon, strengthening it during the lengthening phase of the movement․ Stand with your heels on a slightly elevated surface, like a step․ Rise up onto your toes, then slowly lower your heels below the step’s level, controlling the descent․
This controlled lowering is the eccentric portion․ Focus on a slow, deliberate motion, feeling the stretch and contraction in your calf and inner ankle․ Start with 2-3 sets of 10-15 repetitions, adjusting the range of motion based on your comfort level․ Ensure minimal pain; modify if needed․ This exercise builds tendon resilience and supports arch function․
Single Leg Balance Exercises
Single leg balance exercises are fundamental for improving proprioception and strengthening the muscles supporting the foot and ankle, including the posterior tibialis․ Begin by standing on one leg, maintaining a slight bend in the knee․ Focus on keeping your ankle stable and preventing inward rolling․
Start with 30-second holds, repeating 2-3 times per leg․ Progress by closing your eyes, or performing the exercise on an unstable surface like a foam pad․ This challenges the tendon further․ Aim for controlled, steady balance, gradually increasing the duration and difficulty․ These exercises enhance stability and functional movement patterns․
Phase 4: Functional Exercises

Functional exercises bridge the gap between isolated strengthening and real-world activities․ Step-ups and step-downs, performed with a focus on eccentric control, mimic walking and stair climbing, challenging the posterior tibialis during both ascent and descent․ Heel walks, lifting the toes off the ground, specifically target this tendon․

Begin with low step heights and gradually increase them as strength improves․ Focus on maintaining proper form – avoid inward rolling of the foot․ Perform 2-3 sets of 10-15 repetitions for each exercise․ These movements integrate the strengthened tendon into functional movements, improving overall stability and reducing the risk of re-injury․
Step-Ups and Step-Downs (Eccentric Focus)
Step-ups and step-downs are excellent for building functional strength, particularly emphasizing the eccentric phase – the controlled lowering portion of the movement․ Begin with a low step (4-6 inches)․ Step up, focusing on engaging the glutes and core, then slowly lower yourself down․ This controlled descent is where the posterior tibialis works hardest․
Aim for 2-3 sets of 10-15 repetitions per leg․ Monitor for any pain or inward rolling of the foot․ Progress by increasing step height gradually․ Maintaining balance is key; use support if needed initially․ This exercise mimics daily activities like climbing stairs, improving real-world functionality․
Heel Walks

Heel walks are a functional exercise targeting the posterior tibialis and calf muscles․ Perform this by walking on your heels for a designated distance (20-30 feet), keeping your toes lifted off the ground․ Maintain a slow, controlled pace, focusing on engaging the muscles that lift the arch of your foot․
Complete 2-3 sets, repeating the heel walk distance․ This exercise strengthens the muscles responsible for plantar flexion and inversion, crucial for arch support․ Be mindful of your form; avoid excessive inward or outward rolling of the ankles․ If pain arises, discontinue and consult a healthcare professional․ This exercise improves gait mechanics and overall foot stability․

Exercise Protocol & Progression
Begin with gentle exercises, gradually increasing resistance and repetitions․ Monitor pain levels closely, adjusting the protocol as needed for optimal recovery and strengthening․
Repetitions, Sets, and Frequency
Initially, aim for 8-12 repetitions of each exercise, completing 2-3 sets per session․ As strength improves, progressively increase to 3 sets of 10-15 repetitions, utilizing increased resistance where appropriate․ Daily performance is often recommended, particularly in the early phases, to promote consistent strengthening and improved function․
However, it’s vital to listen to your body and avoid overexertion․ Frequency can be adjusted based on individual tolerance and pain levels․ Consistent, moderate exercise is more beneficial than infrequent, intense sessions․ Remember to gradually increase the resistance or complexity of the exercises as you gain strength and stability, ensuring a safe and effective progression․
Monitoring Pain Levels During Exercise
Throughout your exercise program, closely monitor your pain levels․ A slight discomfort is acceptable, but sharp or increasing pain signals a need to modify or stop the exercise․ Utilize a pain scale (0-10, where 0 is no pain and 10 is severe pain) to track your sensations․ Aim to stay within a 2-3/10 pain range during activity․
If pain exceeds this level, reduce the intensity, decrease repetitions, or choose a less challenging variation․ Avoid “pushing through” significant pain, as this can exacerbate the condition․ Consistent monitoring and appropriate adjustments are crucial for safe and effective rehabilitation, preventing setbacks and promoting optimal recovery․
Advanced Considerations
Proprioceptive training and professional guidance are vital for optimizing recovery and preventing re-injury, especially when progressing beyond basic exercises for PTTD․
Proprioceptive Training
Proprioception, your body’s awareness of its position in space, is often compromised with PTTD due to chronic instability․ Re-establishing this awareness is crucial for long-term function․ Incorporate exercises that challenge balance and coordination, moving beyond simply strengthening the tibialis posterior․
Examples include single-leg stance with eyes closed (progressing from stable to unstable surfaces like a foam pad), wobble board exercises, and dynamic movements like controlled lunges․ These activities force the body to react and stabilize, retraining the neuromuscular system․ Focus on maintaining proper alignment and avoiding compensatory movements․ Consistent proprioceptive training enhances joint stability, reduces the risk of re-injury, and improves overall functional performance, complementing targeted strengthening exercises․
When to Seek Professional Guidance
While many PTTD cases benefit from a home exercise program, professional guidance is essential in several scenarios․ If pain is severe or worsening despite consistent exercise, consult a physical therapist or physician․ Similarly, if you experience significant swelling, instability, or difficulty walking, seek immediate evaluation․
A professional can accurately diagnose the stage of PTTD and tailor an exercise plan to your specific needs․ They can also rule out other potential causes of your symptoms․ Don’t hesitate to seek help if you’re unsure about proper form or progression, or if you’re not seeing improvements after several weeks of dedicated effort․ Early intervention often prevents progression to more severe stages requiring surgical intervention․