Kaivac 1750 Parts Manual: A Comprehensive Guide
This detailed manual assists with installation, operation, and maintenance of the Kaivac 1750, ensuring optimal performance and longevity of your cleaning system.
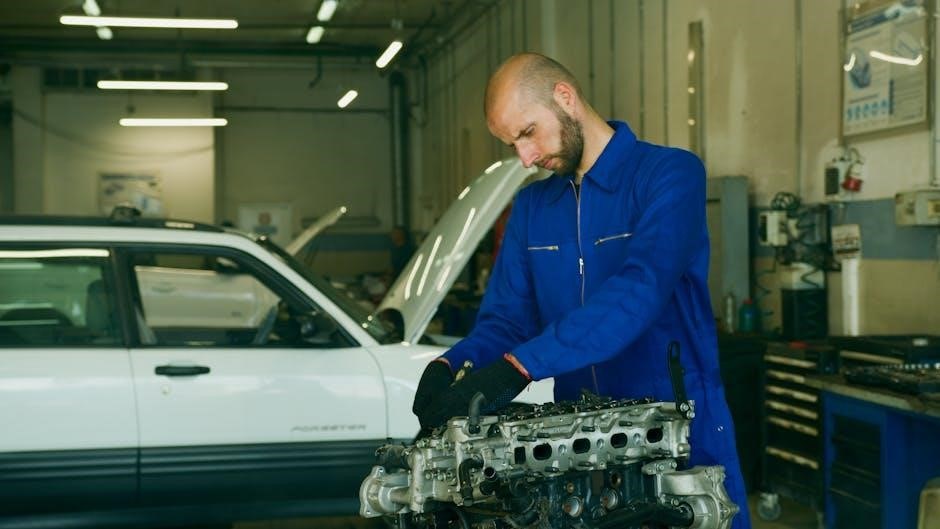
The Kaivac 1750 represents a significant advancement in floor cleaning technology, offering a powerful and efficient solution for various commercial and industrial environments. This machine isn’t simply a vacuum; it’s a complete cleaning system designed to simultaneously spray, scrub, and vacuum hard floor surfaces, leaving them exceptionally clean and dry in a single pass.
This parts manual is specifically created to guide you through understanding, maintaining, and repairing your Kaivac 1750. Whether you’re a seasoned maintenance professional or new to operating this equipment, this resource will prove invaluable. Proper maintenance, utilizing genuine Kaivac parts, is crucial for maximizing the machine’s lifespan and maintaining peak performance.
We aim to empower you with the knowledge to keep your Kaivac 1750 operating at its best, minimizing downtime and ensuring consistently superior cleaning results.
Understanding the Kaivac 1750 System
The Kaivac 1750 operates on a unique, multi-stage cleaning process. It begins with a controlled spray of cleaning solution, followed by effective scrubbing action from the rotating brush head. Simultaneously, a powerful vacuum removes the dirty solution, leaving the floor remarkably clean and quickly dry. This “spray, scrub, and vacuum” approach minimizes water usage and maximizes cleaning efficiency.
Key to the system’s effectiveness is the integration of its components – the solution tanks, the high-performance vacuum motor, and the durable brush drive system. Understanding how these parts interact is essential for proper maintenance and troubleshooting. This manual details each component, providing exploded views and part numbers for easy identification and replacement.
Regularly reviewing this system overview will enhance your ability to diagnose and resolve any operational issues.

Key Components & Parts Breakdown
This section provides a detailed inventory of all Kaivac 1750 parts, including diagrams, part numbers, and descriptions for simplified maintenance and repair.
Frame & Chassis Components
The Kaivac 1750’s robust frame and chassis are critical for durability and stability during operation. Key components include the main frame assembly, constructed from high-impact resistant polymers, and the wheel assemblies – typically featuring non-marking casters for smooth maneuverability.
Detailed diagrams illustrate the frame’s structural elements, highlighting mounting points for other systems. Part numbers are provided for each frame section, caster wheel, and associated hardware like bolts and washers. Regular inspection of the frame for cracks or damage is recommended. Replacement parts ensure continued structural integrity and safe operation. Proper chassis maintenance extends the life of your Kaivac 1750, preventing costly repairs and downtime.
Solution Tanks & Plumbing
The Kaivac 1750 utilizes a dual-tank system – one for clean solution and another for recovery. These tanks, typically constructed from durable polyethylene, are clearly labeled and feature capacity markings. The plumbing system consists of hoses, fittings, and a solution pump responsible for delivering cleaning solution to the brush head.
This section details each component with exploded views and part numbers. Proper maintenance involves flushing tanks regularly to prevent buildup and inspecting hoses for leaks or cracks. The pump requires periodic checks for proper operation. Diagrams illustrate the complete fluid path, aiding in troubleshooting dispensing issues. Maintaining clean plumbing ensures optimal cleaning performance and prevents cross-contamination.
Vacuum System & Motor
The Kaivac 1750’s powerful vacuum system is crucial for immediate recovery of dirty solution, leaving surfaces drier and cleaner. This system centers around a high-efficiency vacuum motor, typically a two-stage design, providing strong suction. Key components include the vacuum fan, inlet connections, and a recovery tank.
This section provides detailed breakdowns of the motor assembly, fan blades, and associated hardware. Regular filter maintenance (covered elsewhere in this manual) is vital for maintaining suction power. Troubleshooting guides address common issues like loss of suction, often linked to clogged filters or hoses. Diagrams illustrate airflow paths and component locations for easy identification and repair.
Brush Heads & Drive System
The Kaivac 1750 utilizes a robust brush head and drive system to effectively agitate and loosen dirt from various surfaces. This section details the different brush head options available – varying bristle types for different floor types – and their corresponding part numbers.
Exploded diagrams illustrate the assembly of the brush head, including bristle cartridges, brush plates, and the drive motor connection. Maintenance focuses on inspecting bristle wear and replacing worn components. The drive system, featuring a belt and pulley arrangement, is also covered, with instructions for belt replacement and tension adjustment to ensure optimal brush rotation speed and cleaning performance.

Maintenance & Repair Procedures
Regular upkeep is crucial for peak performance. This section provides step-by-step guides for filter changes, pump care, and component replacements for the Kaivac 1750.
Filter Replacement & Cleaning
Maintaining a clean filter is paramount for optimal suction and performance of your Kaivac 1750. Regularly inspect the filter for debris and damage; a clogged filter drastically reduces cleaning efficiency.
To replace the filter, first, ensure the machine is powered off and disconnected. Locate the filter access panel – its position varies by model, so consult your specific diagrams. Remove the old filter, noting its orientation for correct installation of the new one.
Always use genuine Kaivac replacement filters to guarantee a proper fit and filtration quality. Before installing the new filter, clean the filter housing. Securely install the new filter, ensuring a tight seal. Periodically, you can gently clean reusable filters with mild soap and water, allowing them to dry completely before reinstallation.
Pump Maintenance & Troubleshooting
The Kaivac 1750’s pump is crucial for solution delivery; regular maintenance prevents operational issues. Begin by checking the pump intake screen for blockages – debris can significantly reduce flow. Periodically flush the pump with clean water to remove accumulated residue.
If you experience low solution flow, first verify the solution tanks are full. Next, inspect the pump hoses for kinks or leaks. Never run the pump dry, as this can cause damage.
For troubleshooting, listen for unusual noises – grinding or squealing may indicate pump wear. If the pump fails to prime, check for air leaks in the suction line. Consult the parts diagram to identify and replace worn pump components as needed, always using genuine Kaivac parts.
Brush Motor & Drive Belt Replacement
Maintaining the brush motor and drive belt ensures effective scrubbing action. Before any work, disconnect the power supply! To replace the drive belt, access the brush head compartment and release tension on the motor mount. Carefully remove the old belt and install the new one, ensuring proper alignment on the pulleys.

If the brush head isn’t rotating, inspect the belt for wear or breakage. A worn brush motor may exhibit slow speed or unusual noises.
Always use a genuine Kaivac replacement motor to guarantee compatibility and performance. Refer to the exploded view diagram for correct motor orientation and mounting procedures. Secure all components tightly after replacement and test operation before resuming cleaning.
Nozzle & Wand Inspection & Repair
Regular inspection of the nozzle and wand is crucial for maintaining optimal suction and spray patterns. Check for cracks, clogs, or wear, particularly at connection points. To clear clogs, disconnect the wand and use a flexible wire or compressed air – never use sharp objects that could damage the internal components.
If the nozzle is damaged, replace it with a genuine Kaivac part. Inspect the wand’s quick-connect fittings for proper sealing; replace O-rings if necessary.
Ensure all connections are secure to prevent solution leakage or suction loss. Refer to the parts diagram for proper assembly and component identification.

Troubleshooting Common Issues
This section provides solutions for frequently encountered problems with the Kaivac 1750, aiding in quick diagnosis and efficient repair procedures.
Loss of Suction
Diagnosing suction loss in your Kaivac 1750 requires a systematic approach. First, inspect the vacuum motor for obstructions or damage, ensuring proper functionality.
Next, thoroughly check the filtration system; a clogged filter is a common culprit. Replace or clean the filter as needed. Examine the vacuum hose and wand for any blockages, cracks, or disconnections.
Inspect the seals around the tank and connections for leaks. A compromised seal can significantly reduce suction power. Finally, verify the solution tank isn’t overfilled, potentially entering the vacuum pathway. Addressing these areas will restore optimal suction performance.
Electrical Problems
Addressing electrical issues with your Kaivac 1750 demands caution and a methodical approach. Always disconnect the power supply before any inspection. Begin by checking the power cord for damage, ensuring it’s securely connected.
Inspect the circuit breaker or fuse box; a tripped breaker or blown fuse indicates an overload. Examine the motor brushes for wear and tear, replacing them if necessary. Verify all wiring connections are tight and free from corrosion.
If problems persist, consult a qualified electrician. Never attempt repairs beyond your expertise, as electrical malfunctions can be hazardous. Prioritize safety and proper grounding.
Solution Dispensing Issues
Consistent solution dispensing is crucial for effective cleaning with your Kaivac 1750. If experiencing issues, first verify the solution tanks are adequately filled with the correct cleaning solution. Inspect the solution lines for kinks, clogs, or damage – replace any compromised sections.
Check the nozzle and wand for blockages, flushing them thoroughly with clean water. Examine the pump for proper operation; a weak pump can cause insufficient solution flow. Ensure the dilution ratios are accurate, as incorrect mixing can affect dispensing.
Regularly clean the filters to prevent buildup that restricts flow. If issues continue, consult the troubleshooting section for pump-specific guidance.
Brush Head Not Rotating
A non-rotating brush head significantly reduces cleaning effectiveness on your Kaivac 1750. Begin by verifying the machine is powered on and the safety switch is engaged. Inspect the drive belt for wear, breakage, or slippage – replace if necessary. Check the brush motor for any signs of damage or overheating.
Examine the brush head itself for obstructions like tangled debris or jammed materials. Ensure the motor is receiving power; test with a multimeter if possible. Confirm the drive system is properly aligned and connected.
If the motor hums but doesn’t rotate, it may indicate a capacitor issue. Consult a qualified technician for further diagnosis and repair.
Safety Precautions & Warnings
Always prioritize safety when operating the Kaivac 1750. Follow electrical guidelines, handle chemicals carefully, and adhere to general operating procedures.
Electrical Safety Guidelines
Before any maintenance or repair, always disconnect the Kaivac 1750 from the power source. Never operate the machine with a damaged power cord or plug; replace immediately.
Ensure the electrical outlet is properly grounded and matches the voltage requirements of the unit. Avoid using extension cords whenever possible; if necessary, use a heavy-duty cord rated for the machine’s amperage.
Do not expose electrical components to water or other liquids. Inspect wiring regularly for signs of wear or damage. If you are uncomfortable performing electrical repairs, consult a qualified technician. Improper electrical work can create a serious hazard and void the warranty. Always follow local electrical codes.
Chemical Handling Procedures
Always wear appropriate personal protective equipment (PPE) – gloves, eye protection, and potentially a mask – when handling cleaning solutions for the Kaivac 1750. Read and understand the Safety Data Sheet (SDS) for each chemical before use.
Never mix different cleaning chemicals, as this can create hazardous fumes or reactions. Dilute concentrated solutions according to the manufacturer’s instructions. Ensure adequate ventilation when operating the machine in enclosed spaces.
Properly store chemicals in labeled containers, away from children and pets. Dispose of unused chemicals according to local regulations. Avoid contact with skin and eyes; rinse immediately with water if contact occurs.
General Operating Safety
Before each use, inspect the Kaivac 1750 for any damaged parts, ensuring all components are securely fastened. Never operate the machine without the proper filters and guards in place.
Keep the work area clear of obstructions and ensure adequate lighting. Avoid operating the machine on wet or slippery surfaces. Do not attempt to clean up flammable or explosive materials with the Kaivac 1750.
Always disconnect the power supply before performing any maintenance or repairs. Never leave the machine unattended while in operation. Be mindful of the power cord and avoid tripping hazards. Report any malfunctions immediately.
Parts Ordering & Support
Access genuine Kaivac 1750 replacement parts and expert assistance through the official website or by contacting their dedicated customer support team.
Locating Your Model & Serial Number
Before ordering any replacement parts for your Kaivac 1750, accurately identifying your specific model and serial number is crucial. This ensures compatibility and prevents ordering incorrect components. The model number is typically found on a label affixed to the machine’s frame, often near the power switch or solution tank.
The serial number, a unique identifier for your unit, is usually located on the same label as the model number, or potentially on a separate plate. Carefully record both the model and serial number; you’ll need this information when contacting Kaivac customer support or placing an order through their official parts website. Having this data readily available streamlines the process and guarantees you receive the correct parts for your Kaivac 1750.
Kaivac Official Parts Website

For convenient and reliable access to genuine Kaivac 1750 replacement parts, visit the official Kaivac Parts Website. This online platform offers a comprehensive catalog of components, allowing you to search by part number, model number, or keyword.
The website features detailed parts diagrams and descriptions, aiding in accurate identification. Creating an account allows you to save your machine’s information (model and serial number) for faster ordering in the future. Secure online ordering and various shipping options are available. Be sure to double-check your selections before submitting your order. The official website guarantees authentic Kaivac parts, ensuring optimal performance and maintaining your machine’s warranty.
Contacting Kaivac Customer Support
If you require assistance with parts identification, troubleshooting, or have any questions regarding your Kaivac 1750, the Kaivac Customer Support team is readily available. You can reach them via phone during business hours – check the official Kaivac website for current times.
Alternatively, submit your inquiry through the online contact form found on their website, providing detailed information about your machine (model and serial number) and the issue you are experiencing. Email support is also an option, with a typical response time of 24-48 hours. Having your parts manual handy when contacting support can expedite the process. Knowledgeable representatives are prepared to guide you through repairs or assist with parts ordering.