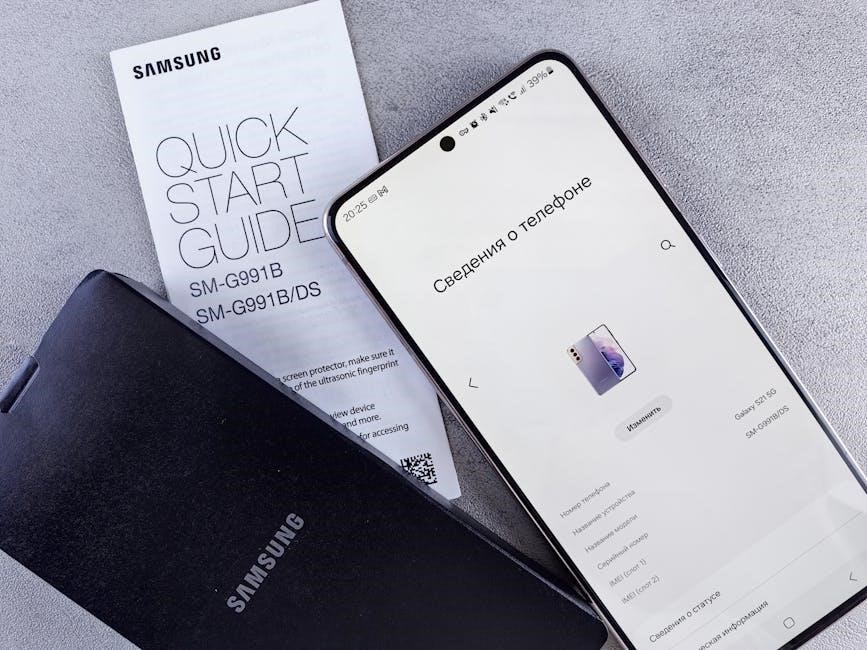
P-Touch User Guide: Comprehensive Overview (February 17, 2026)
Today’s date is 02/17/2026 23:08:38 (). This comprehensive guide details network settings, the P-touch Editor, Transfer Manager, and Update Software.
The P-touch 2600/2610 offers quality and performance, making it a practical machine for home use. Keep this guide handy for future reference!
P-Touch label makers represent a versatile solution for organization and identification needs, offering a streamlined approach to creating professional-quality labels. These devices cater to a wide range of applications, from home organization and office labeling to industrial marking and asset tracking. The P-touch 2600/2610 models, in particular, stand out for their ease of use and reliable performance.
This user guide serves as a comprehensive resource for maximizing the potential of your P-Touch label maker. It covers everything from initial setup and software installation to advanced features and troubleshooting. Whether you’re a first-time user or an experienced label-making enthusiast, this guide will equip you with the knowledge to create labels efficiently and effectively. The integration with dashboard apps simplifies the process, allowing for quick formatting and printing.
Furthermore, understanding the automatic shut-off feature enhances usability and conserves battery life.
Understanding P-Touch Models: 2600/2610
The P-Touch 2600 and P-Touch 2610 models are designed with user-friendliness in mind, sharing a core set of functionalities that make them exceptionally practical for both home and professional environments. Notably, these models are equipped with identical functions, streamlining the user experience regardless of the specific variant purchased. Both offer a straightforward interface and reliable performance, ensuring consistent label quality.
A key advantage of these models is their compatibility with the P-touch Editor software, P-touch Transfer Manager, and P-touch Update Software, facilitating seamless label design and device maintenance. The intuitive dashboard app integration further simplifies operation, allowing for direct printing from your device. The automatic shut-off feature contributes to extended battery life and convenient operation.
Referencing the P-touch Template Manual and Raster Command Reference will unlock advanced customization options.
Key Features and Benefits
The P-Touch 2600/2610 label makers boast several key features designed for efficiency and convenience. A primary benefit is the seamless integration with the P-touch ecosystem, including the Editor, Transfer Manager, and Update Software, enabling customized label creation and device maintenance. The dashboard app integration offers a simplified printing experience – simply format and print directly from your device.
Furthermore, the automatic shut-off feature conserves battery power, ensuring the device is ready when needed. Users appreciate the ease of use; it’s as simple as pressing the on button. The models’ compatibility with various templates, detailed in the P-touch Template Manual, expands creative possibilities.
The robust design and reliable performance make these P-Touch models a practical solution for diverse labeling needs.

Setting Up Your P-Touch Label Maker

To begin, ensure you have the necessary components: the P-Touch label maker, a compatible tape cassette, and a power source (batteries or AC adapter). First, install a tape cassette, confirming it snaps securely into place. Verify the tape end feeds correctly under the tape guides.
Next, power on the device. For software installation and optimal functionality, refer to the Quick Setup Guide, which provides operating system-specific instructions. Remember that screenshots may display “XX-XXXX” representing your specific P-Touch model number.
Proper setup is crucial for seamless operation. Following these initial steps will ensure your P-Touch label maker is ready for creating professional-quality labels.
Installing the P-Touch Software
Installing the P-Touch software unlocks the full potential of your label maker, enabling advanced editing and customization options. Begin by consulting the Quick Setup Guide for detailed instructions tailored to your computer’s operating system. The guide provides a step-by-step process for a smooth installation.
During installation, you may encounter screenshots displaying “XX-XXXX” as a placeholder for your specific P-Touch model number. This is normal; the software is designed to be compatible with various models. Ensure your system meets the minimum requirements outlined in the guide.
The software suite includes P-touch Editor, Transfer Manager, and Update Software, each contributing to a comprehensive labeling experience.
Quick Setup Guide Reference
The Quick Setup Guide serves as a concise, readily accessible resource for installing the P-touch software. It streamlines the process, offering clear, step-by-step instructions designed for efficiency. Refer to this guide first for the most direct path to software installation and initial setup.
Within the guide, you’ll find operating system-specific procedures, ensuring compatibility with your computer’s environment. Pay close attention to the screenshots, noting that “XX-XXXX” represents your P-touch model number. This placeholder is used throughout the documentation for clarity and broad applicability.
The guide prioritizes a user-friendly experience, minimizing complexity and maximizing ease of use. It’s your first point of call for a hassle-free setup.
Operating System Specific Installation
To ensure seamless integration, the P-touch software installation process varies depending on your computer’s operating system. Detailed procedures are provided to accommodate Windows and macOS environments, offering tailored guidance for each platform.
Follow the instructions specific to your OS, carefully navigating the prompts and settings. The Quick Setup Guide offers screenshots illustrating each step, with “XX-XXXX” serving as a placeholder for your specific P-touch model number throughout the documentation.
These OS-specific instructions address potential compatibility issues and optimize performance. By adhering to the correct procedure, you’ll establish a stable connection and unlock the full functionality of your P-touch label maker.
Tape Cassette Installation
Proper tape cassette installation is crucial for optimal P-touch performance. Begin by carefully selecting the appropriate tape type for your labeling needs. Gently insert the cassette into the designated compartment within the label maker.
Ensure the cassette snaps securely into place, indicating a proper connection. A key step involves verifying that the tape’s leading edge feeds correctly under the tape guides. This ensures smooth and consistent label printing.
Incorrect installation can lead to printing errors or tape jams. Always double-check that the cassette is firmly seated and the tape path is unobstructed. Following these simple steps guarantees reliable label creation.
Basic Operation: Powering On and Printing
Initiating operation with your P-touch label maker is remarkably straightforward. Simply press the power button to activate the device. Many modern P-touch models, like the 2600/2610, feature an automatic shut-off function for energy conservation, activating when idle.
Once powered on, the device is ready for printing. Utilizing the integrated dashboard app streamlines the process; the app appears automatically upon activation. Format your label directly within the app and initiate printing with a single touch.

This simplified approach minimizes complexity, making label creation exceptionally user-friendly. The printer’s automatic shut-off ensures longevity and convenience, awaiting your next labeling task.
P-Touch Editor Software
The P-touch Editor software is a crucial component for designing and customizing your labels. Detailed installation instructions can be found within the Quick Setup Guide, tailored to your computer’s operating system. The software interface allows for extensive label formatting options, going beyond basic text input.
Throughout the installation process, remember that “XX-XXXX” in screenshots represents your specific P-touch model number. This software empowers users to create professional-looking labels with various fonts, symbols, and barcodes.
Explore the software’s capabilities to unlock the full potential of your P-touch label maker, enabling personalized and efficient labeling solutions for diverse applications. Refer to the P-touch Template Manual for pre-designed templates.
P-Touch Transfer Manager
The P-touch Transfer Manager facilitates seamless data transfer between your computer and the P-touch label maker. This software is essential for utilizing pre-designed templates or creating complex label designs that require more extensive editing than the label maker’s built-in interface allows.
It streamlines the process of sending label information, ensuring accurate and efficient printing. The Transfer Manager works in conjunction with the P-touch Editor, allowing you to create labels on your computer and then effortlessly transfer them to your P-touch device for printing.
Proper installation, as detailed in the Quick Setup Guide, is vital for optimal performance. Explore its features to maximize your labeling productivity.
P-Touch Update Software
The P-touch Update Software is crucial for maintaining optimal performance and accessing the latest features of your P-touch label maker. Regularly updating your device ensures compatibility with new operating systems and resolves potential software glitches. This software downloads and installs the newest firmware directly onto your P-touch, enhancing its functionality.
It’s recommended to check for updates periodically, especially after installing a new operating system on your computer. The update process is generally straightforward, guided by on-screen instructions. Utilizing the latest software version guarantees a smoother and more reliable labeling experience.
Refer to the provided documentation for detailed instructions on downloading and running the P-touch Update Software.
Troubleshooting Common Issues
This section addresses frequently encountered problems with your P-touch label maker. Weak batteries are a common issue; promptly replace them with new ones to ensure consistent printing. Another potential problem involves invalid label length settings. Double-check your selections to confirm they align with the tape cassette and desired label size.
If the printer fails to operate, verify the tape cassette is correctly installed and the tape feeds smoothly under the guides. For software-related issues, ensure the P-touch Editor or Transfer Manager is properly installed and compatible with your operating system.
Consult the full manual for more detailed troubleshooting steps and solutions to less common problems.
Weak Batteries: Replacement Guide
Weak batteries significantly impact P-touch performance, leading to faded prints or complete printer failure. To address this, locate the battery compartment, typically on the underside of the unit. Gently open the compartment cover, noting the battery orientation for correct re-installation.

Remove the depleted batteries and insert new, compatible batteries – usually AAA or AA, depending on your model. Ensure proper polarity (+ and -) alignment as indicated within the compartment. Close the battery cover securely until it clicks into place.
Test the printer by attempting a short print job. If issues persist, double-check battery installation and consider using a fresh set of batteries from a reputable brand.
Invalid Label Length Settings
Encountering an “Invalid Label Length” error indicates a mismatch between the selected label length in your P-touch software or device and the actual tape cassette installed. This often occurs when changing tape types without adjusting the settings. To resolve this, access the printer’s settings menu, typically through the P-touch Editor software or directly on the device.
Navigate to the “Label Length” or “Tape Type” option. Select the correct length corresponding to your installed tape cassette. Ensure the chosen setting accurately reflects the tape’s dimensions. Save the changes and attempt to print again.
If the error persists, verify the tape cassette is properly installed and that the tape is feeding correctly. A damaged or incorrectly seated cassette can also trigger this error.
Parts Reference List (P-Touch 65/60 Model)
This document serves as a comprehensive parts reference for the P-touch 65/60 model, facilitating efficient repairs and replacements. The list is organized into three primary sections: Print Mechanism Components, detailing the internal workings responsible for label creation; Covers, outlining the external casing and protective elements; and Packing Materials, specifying components used for shipping and protection.
When ordering replacement parts, always cross-reference with this guide to ensure compatibility. Pay close attention to part numbers and specifications. For example, Model PO3242 has a range of A equaling 0 and a range of B equaling 0-7. Accurate identification is crucial for a successful repair. Consult the Parts Guide Manual for detailed diagrams and further assistance.
Print Mechanism Components
The print mechanism is the core of the P-touch 65/60 model, responsible for transferring ink onto the label tape to create legible markings. Key components include the print head, which generates the heat used in thermal printing, and the platen roller, which presses the tape against the print head. Precise alignment and functionality of these parts are critical for print quality.
Additional components include the tape feed motor, controlling tape advancement, and various gears and levers ensuring smooth operation. Regular inspection and cleaning of these parts are recommended to maintain optimal performance. Refer to the detailed diagrams within the Parts Reference List for specific locations and part numbers. Proper maintenance extends the lifespan of your P-touch label maker.
Covers and Packing Materials
This section details the external covers and packing materials utilized in the P-touch 65/60 model. These components primarily serve a protective function, safeguarding the internal print mechanism from dust and physical damage. The top cover and bottom cover are essential for maintaining the structural integrity of the device, while the battery cover ensures secure power source access.

Packing materials, though typically discarded after initial setup, played a crucial role in protecting the unit during shipping. These include protective foam inserts and cardboard packaging designed to absorb impact. Refer to the Parts Reference List for detailed diagrams illustrating the location and part numbers of each cover. Proper reassembly requires careful alignment of these components.
PLC Connection Guide
This guide outlines the process of connecting your P-touch label maker to a Programmable Logic Controller (PLC) for automated labeling applications. Utilizing PLC integration allows for dynamic label printing triggered by real-time data and process events. Supported PLC models include PO3042, PO3142, PO3242, and PO3342, each requiring specific wiring configurations.
Before commencing, ensure compatibility between your P-touch model and the PLC. Refer to the detailed wiring diagrams provided for each supported model. Proper connection involves establishing communication protocols for data transfer. Carefully verify the range of A and B (e.g., 0-7 for PO3242) before ordering parts. Incorrect wiring can lead to malfunction; consult a qualified technician if needed.
Wiring Diagrams: PO3042, PO3142, PO3242, PO3342
This section provides detailed wiring schematics for connecting P-touch label makers to various Programmable Logic Controller (PLC) models: PO3042, PO3142, PO3242, and PO3342. Each diagram illustrates the precise connections required for successful communication and data transfer between the devices.
Important Considerations: Ensure power is disconnected before making any connections. Carefully match wire colors and terminal designations as shown in the diagrams. For PO3242, verify the range of A is 0 and the range of B is 0-7. Incorrect wiring can damage equipment or prevent proper functionality. Always double-check connections before powering on the system. Refer to the PLC’s documentation for specific input/output specifications.
Ordering Parts: Using the Parts Guide Manual
To ensure accurate parts ordering for your P-touch label maker, always consult the official Parts Guide Manual. This manual contains detailed diagrams and part numbers essential for identifying the correct components needed for repairs or replacements. Before ordering, meticulously verify the figures in the manual to match the specific model and revision of your device.
Incorrect part numbers can lead to delays and incompatibility issues. When placing an order, clearly specify the part number, quantity, and any relevant model information. Double-check all details before submitting your request. Utilizing the Parts Guide Manual streamlines the process and minimizes errors, guaranteeing you receive the appropriate parts for your P-touch label maker.
P-Touch Template Manual
The P-touch Template Manual serves as a valuable resource for users seeking pre-designed label formats and layouts. This manual provides a diverse collection of templates suitable for various applications, including organization, filing, and identification. Users can leverage these templates to quickly create professional-looking labels without extensive design work.
The manual details how to access and customize these templates within the P-touch Editor software. It offers guidance on modifying text, fonts, sizes, and graphics to suit individual needs. Furthermore, the P-touch Template Manual complements the Raster Command Reference, enabling advanced users to create highly customized label designs. Explore the manual to unlock the full potential of your P-touch label maker!
Raster Command Reference
The Raster Command Reference is an advanced guide for users who wish to exert precise control over their P-touch label designs. This reference details a comprehensive set of commands that allow for the creation of custom graphics, barcodes, and specialized text formatting beyond the standard P-touch Editor capabilities.
It’s designed for those comfortable with coding or seeking highly tailored label solutions. Users can utilize these commands to define specific print parameters, manipulate raster images, and implement complex label layouts. This manual works in conjunction with the P-touch Template Manual, allowing for both pre-designed starting points and fully customized creations. Mastering these commands unlocks the full creative potential of your P-touch system.
Automatic Shut-Off Feature
The P-touch label maker incorporates a convenient Automatic Shut-Off Feature designed to conserve battery life and enhance usability. After a period of inactivity, the device will automatically power down, eliminating the need for manual switching. This feature is particularly useful for intermittent label printing tasks, ensuring the device is ready when needed without wasting energy.
Users have reported a seamless experience; simply press the on button, and the dashboard app appears. The printer is easily forgotten as it automatically shuts off, patiently awaiting its next use. This functionality simplifies operation and makes the P-touch an ideal replacement for standalone labelers, offering both efficiency and convenience.
Dashboard App Integration
The P-touch label maker boasts seamless Dashboard App Integration, revolutionizing the label creation and printing process. Upon powering on the device, the dedicated app instantly appears on your dashboard, providing a user-friendly interface for label formatting and customization. This integration eliminates the complexities often associated with traditional label makers, offering a streamlined and intuitive experience.
Users praise the simplicity – format your label directly within the app and initiate printing with a single tap. The app’s intuitive design and direct connection to the printer minimize setup and operation hassles. This feature transforms the P-touch into a modern, efficient labeling solution, ideal for both home and professional use.